
Halloween is the perfect time for creative nail art. Acrylic nails offer endless possibilities.
As the spooky season approaches, many look for ways to express their Halloween spirit. One popular method is through nail art. Halloween nails done with acrylic can make a bold statement. Whether you prefer eerie designs or cute, festive styles, acrylic nails provide a versatile canvas.
From ghostly patterns to candy corn colors, the options are vast. Get ready to explore some thrilling and fun ideas for Halloween nails. This guide will inspire you to create the perfect Halloween look with acrylic nails. So, grab your nail tools and let’s dive into the world of Halloween nail art!

Credit: www.youtube.com
Trending Halloween Nail Designs
October is here, and it’s time to get your nails ready for the spookiest season! If you’re looking to make a statement with your nails this Halloween, acrylic designs are the way to go. Dive into the world of trending Halloween nail designs and discover the perfect look for your spooky celebrations.
Popular Themes
When it comes to Halloween nails, popular themes are a great starting point. From classic pumpkins and ghosts to intricate spider webs and skeletons, these designs never go out of style. You can mix and match different elements to create a unique look.
- Pumpkin Spice: Embrace the Halloween spirit with pumpkin-themed nails. Use orange and black acrylics to create cute or eerie pumpkin faces.
- Ghostly Glam: White and black acrylics can help you create adorable or spooky ghost designs. Add glitter for an extra glam touch.
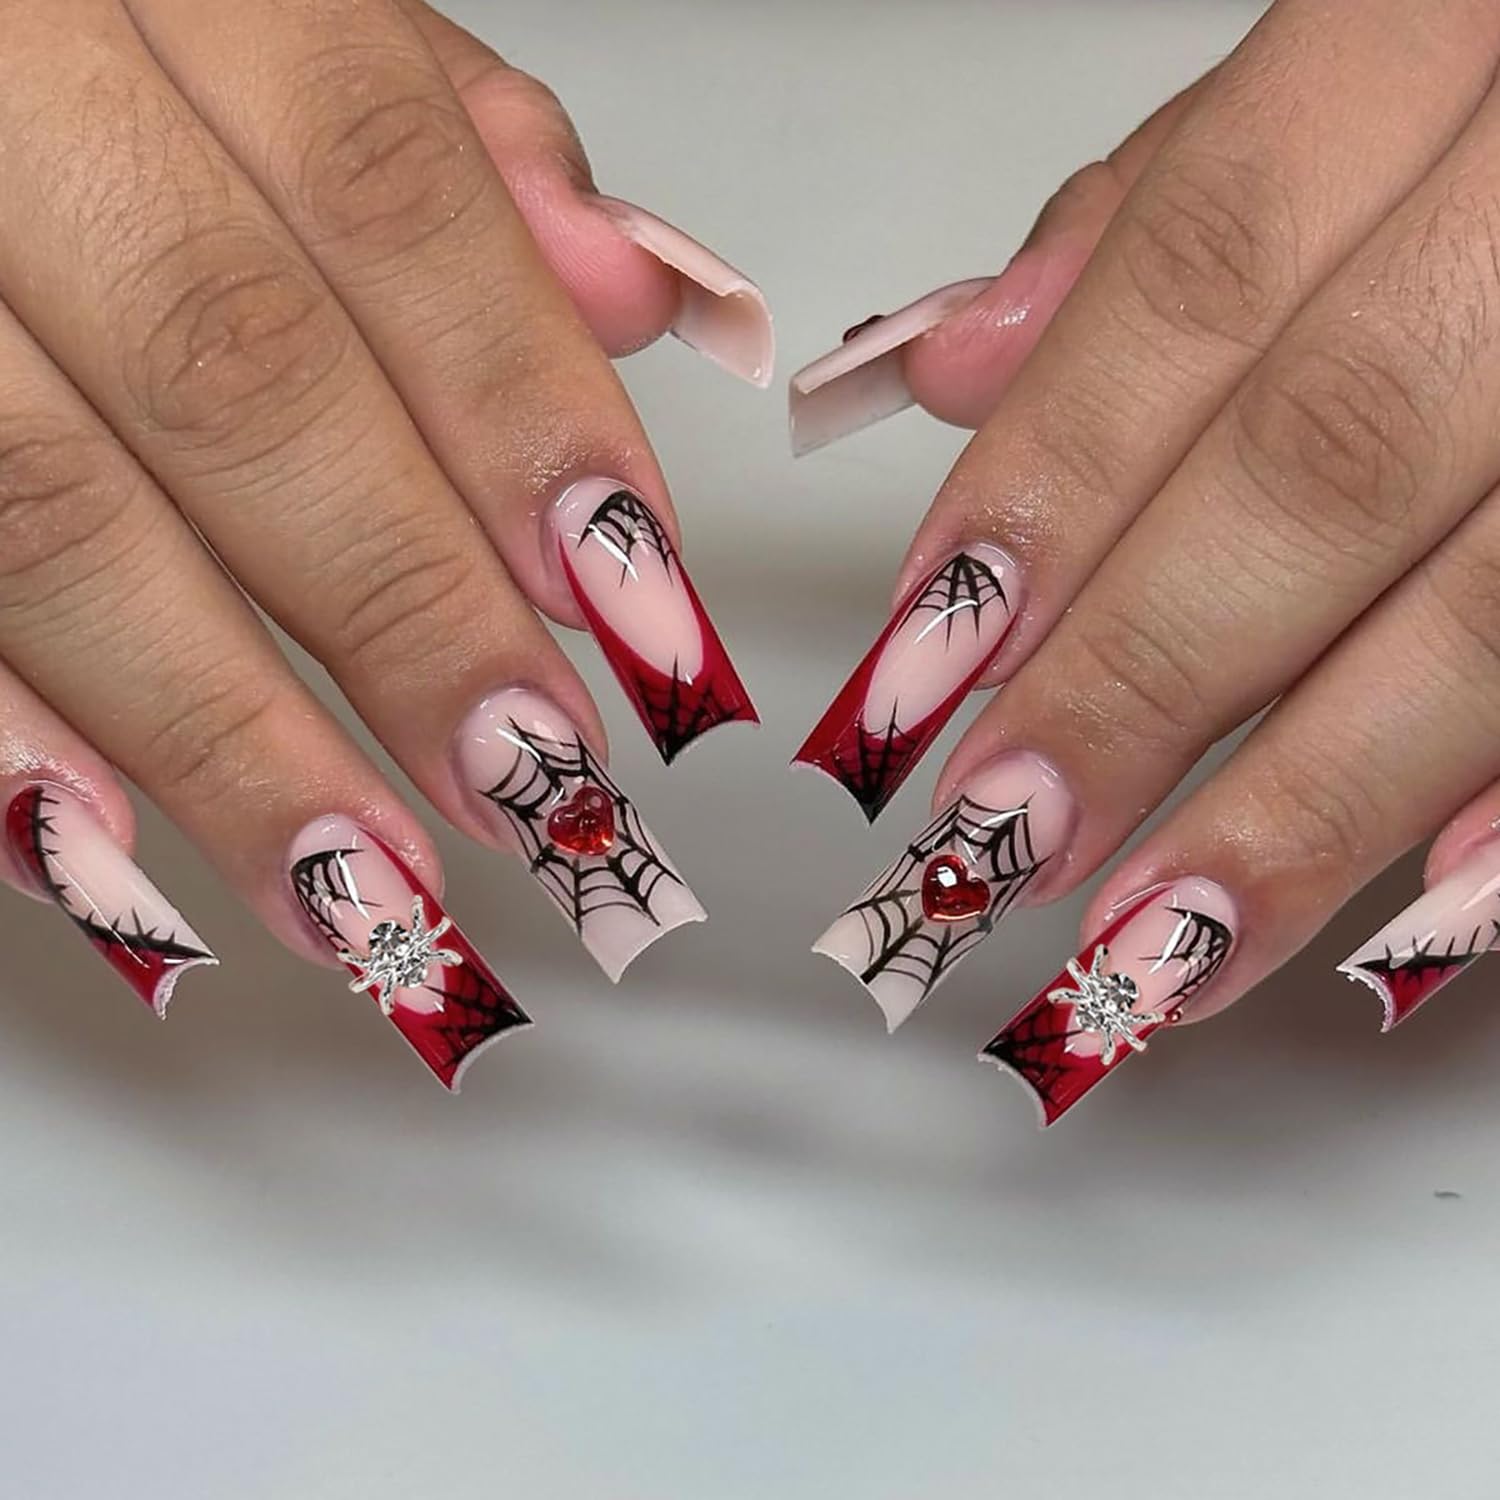
- Spooky Spider Webs: Intricate spider web designs are always a hit. You can use black acrylic on a white base or vice versa for a striking contrast.
- Skeleton Chic: Skeletons and skulls are perfect for a bold look. Black and white acrylics can bring out the chilling details.
Celebrity Inspirations
Ever wondered how celebrities rock their Halloween nails? They often set the trends that everyone follows. Here are some inspirations you can borrow from your favorite stars:
| Celebrity | Design |
|---|---|
| Kylie Jenner | Known for her extravagant nail art, Kylie often goes for bold and intricate designs. Think black and gold spider webs or detailed skeletons. |
| Rihanna | Rihanna’s Halloween nails are often a mix of glamorous and spooky. She loves metallic hues and glitter accents. |
| Lady Gaga | Expect the unexpected with Lady Gaga. Her Halloween nails could feature anything from eerie eyeballs to blood-red accents. |
Have you ever tried to replicate a celebrity nail design? It can be a fun challenge and a great way to personalize your Halloween look.
So, which Halloween nail design will you choose this year? Will you go for a classic theme or take inspiration from your favorite celebrity? Remember, your nails are an extension of your creativity, and Halloween is the perfect time to let your imagination run wild. Happy painting!
Choosing The Right Acrylics
Choosing the right acrylics for your Halloween nails can be exciting. With many options available, it’s important to know what suits you best. From types of acrylics to picking the perfect colors, this guide will help you create the perfect spooky nails.
Types Of Acrylics
There are different types of acrylics you can use for Halloween nails. Regular acrylics are the most common. They are durable and strong. Perfect for long-lasting nail art. Another option is soft gel acrylics. They are more flexible and easier to shape. Good for beginners. Hybrid acrylics combine both types. They offer strength and flexibility. Ideal for intricate designs.
Color Selection Tips
Choosing the right colors for Halloween nails is fun. Start with classic Halloween colors like black, orange, and purple. These colors set the spooky mood. Add accents with white, red, or gold. They make your nails pop. Consider glow-in-the-dark acrylics for extra effect. They look amazing at Halloween parties. Mix and match colors to create unique designs. Don’t be afraid to experiment.
Spooky Spider Webs
Halloween is the perfect time to showcase your creativity with nail art. One of the most captivating designs is the Spooky Spider Webs. These eerie designs add a touch of mystery to your look. With acrylic nails, you can achieve intricate and striking spider webs that make your nails stand out. Let’s dive into the process to create these spooky webs on your nails.
Step-by-step Guide
Start by applying a clear base coat to protect your nails. Next, choose a dark nail polish for the background. Black or deep purple works well. Apply two coats for a solid color. Allow your nails to dry completely before moving on.
For the spider webs, use a thin nail art brush or a fine-tipped pen. Dip the brush into white acrylic paint or nail polish. Begin by drawing a small circle near the edge of your nail. From this circle, draw straight lines radiating outward. These lines form the base of your web.
Connect the lines with curved strokes, forming the web’s intricate pattern. Start from the center and work outward. Make sure each section is connected to create a cohesive design. Let the white paint dry completely.
Finally, seal your spider web design with a clear top coat. This adds shine and protects your artwork. Allow the top coat to dry thoroughly.
Tools Needed
– Clear base coat – Dark nail polish (black or deep purple) – Thin nail art brush or fine-tipped pen – White acrylic paint or nail polish – Clear top coat
These tools help you achieve the perfect spooky spider webs. Ensure each tool is of good quality for the best results. Enjoy creating your Halloween nails!
Ghoulish Ghosts
Halloween is just around the corner, and what better way to get into the spooky spirit than with some ghoulish ghost-themed acrylic nails? This trend is perfect for those who love to embrace the eerie and mysterious vibes of Halloween. Whether you’re aiming for a subtle spooky look or something more dramatic, ghoulish ghost nails can be both fun and stylish. Let’s dive into some fantastic design ideas and application techniques to help you achieve the perfect Halloween nails.
Design Ideas
When it comes to ghoulish ghost nails, the design possibilities are endless. Here are a few ideas to spark your creativity:
- Classic White Ghosts: Create adorable white ghost shapes on a black or dark purple background. Add little black eyes and a mouth for a cute yet spooky effect.
- Glow-in-the-Dark Ghosts: Use glow-in-the-dark acrylic powder to make your ghost designs pop. These nails look amazing under regular light and even more striking in the dark.
- Haunted House Theme: Combine ghost designs with haunted houses, bats, and full moons for a complete Halloween scene on your nails.
- Minimalist Ghosts: If you prefer a more understated look, go for small, minimalist ghost designs on a nude or clear base.
Personally, I love the glow-in-the-dark ghosts. They add an unexpected twist, especially when you’re out at night, and everyone notices your nails glowing eerily. It’s a conversation starter!
Application Techniques
Getting the perfect ghoulish ghost nails requires some technique. Here’s how you can achieve these looks at home or instruct your nail technician:
- Prep Your Nails: Start with clean, filed, and buffed nails. Apply a base coat to protect your natural nails and ensure smooth application.
- Choose Your Base Color: Depending on your design, choose a dark or light base color. Apply two coats and let them dry completely.
- Draw the Ghosts: Use a fine nail art brush or a dotting tool to create ghost shapes. White acrylic paint or polish works best for a classic look. Add details like eyes and mouths with a smaller brush.
- Glow-in-the-Dark Powder: If you’re going for the glow-in-the-dark effect, mix the powder with clear acrylic powder and apply it over your ghost designs. Make sure to cure it under a UV lamp if needed.
- Seal the Design: Finish with a top coat to seal in your design and add shine. This also helps your manicure last longer.
Have you ever tried creating nail art at home? It can be a bit tricky at first, but with practice, you’ll get better. Plus, it’s a fun way to spend an afternoon, especially if you invite friends over for a nail art party. What’s your favorite Halloween nail design? Share in the comments below and let’s inspire each other to get creative this spooky season!
Pumpkin Perfection
Halloween is the perfect time to get creative with your nails. Pumpkin perfection nails are a popular choice. The pumpkin theme offers endless possibilities. They are fun, festive, and fit the season perfectly.
Creative Patterns
Creative patterns make your pumpkin nails stand out. You can try classic jack-o’-lantern faces. These are simple yet effective. Or, add a twist with spooky or funny expressions. Stripes and polka dots add variety. Use black for a spooky touch. Or, use white for a lighter look.
Color Combinations
Color combinations are key for perfect pumpkin nails. Orange is a must for the pumpkin base. Pair it with black for a classic Halloween vibe. White and green can add contrast. Glitter can make your nails sparkle. Metallic shades add a chic touch. Experiment with different shades to find your favorite.
Credit: www.amazon.com
Haunted House Motifs
Halloween is the perfect time to get creative with your nails. Haunted house motifs are a popular choice for acrylic nails during this spooky season. These designs can be intricate and detailed, making your nails look like tiny works of art. From eerie windows to creepy trees, haunted house motifs bring a touch of the supernatural to your fingertips. Below, we will explore some ideas to help you create the perfect haunted house look for your acrylic nails.
Detailed Designs
Detailed designs can make your haunted house nails stand out. Think about adding small elements like bats, ghosts, and spooky windows. These tiny details can turn a simple nail design into a haunted masterpiece. Use a thin brush or nail art pen to draw these elements. This will help you achieve precision and make your designs pop.
Don’t forget to incorporate different colors. Black and white are classic choices for haunted house nails. But adding hints of orange, purple, or green can add more depth and interest. These colors can represent eerie lights or creepy shadows, adding more spookiness to your design.
Creating Depth
Creating depth in your haunted house nail designs can make them look more realistic. One way to do this is by using shading techniques. Gradients can create the illusion of depth and dimension. For example, a gradient sky transitioning from dark blue to black can make your haunted house look more eerie.
Another technique is layering. Start with a basic haunted house silhouette. Then, add details like windows, doors, and trees in layers. This technique will give your nails a 3D effect. It makes the design more interesting and visually appealing.
Finally, consider adding some texture. Matte and glossy finishes can create different effects. A matte black background can make glossy elements like windows and ghosts stand out. This contrast can make your haunted house motifs more eye-catching and spooky.
Creepy Crawlers
Halloween is just around the corner, and it’s the perfect time to get creative with your nails. This year, why not dive into the world of Creepy Crawlers? It’s the perfect way to add a spooky touch to your look. With insect designs and realistic effects, your Halloween nails will be the talk of the party. Let’s explore how you can make your nails scream Halloween.
Insect Designs
Insect designs are an excellent way to make your Halloween nails stand out. Imagine tiny spiders, ants, and beetles crawling on your nails. It’s both creepy and fascinating. You can use small decals or stickers for precision, or if you’re feeling artistic, paint them on yourself.
One Halloween, I decided to go all out with a spider theme. I painted my nails a deep, midnight black and added little white spider webs. I then placed tiny, red gem spiders on top. The result was both eerie and elegant. The designs caught everyone’s attention at the party.
Why not try it yourself? Consider what insects give you the chills. Is it the slithering centipede or the buzzing bee? Use your imagination and choose insects that make your skin crawl. It’s Halloween, after all!
Realistic Effects
Adding realistic effects to your insect designs can take your Halloween nails to the next level. Think about using 3D elements, like small plastic insects or raised gel designs. This will give your nails a more lifelike appearance.
You can also play with textures and finishes. A matte finish can make the insects look more like they are part of your nail, while a glossy top coat can give a slimy, realistic effect. Another idea is to use glow-in-the-dark polish for an extra spooky surprise when the lights go out.
Have you ever thought about using metallic colors for beetles or iridescent polish for dragonflies? These small details make a huge difference. They add depth and realism to your designs, making them even more impressive.
What will you try this Halloween? Will you stick to classic black and white, or will you experiment with colors and textures? Your nails are a canvas; let your creativity crawl out!

Credit: www.amazon.com
Glow-in-the-dark Nails
Halloween is the perfect time to get creative with your nails. One of the most popular trends this season is Glow-in-the-Dark Nails. Imagine your acrylic nails lighting up in eerie green or spooky purple as you walk through a haunted house. It adds that extra bit of fun and mystery to your Halloween look. Not only will they look amazing in the dark, but they are also a great conversation starter at any Halloween party. So, how do you achieve this fantastic look? Let’s dive into the specifics.
Materials Needed
Before you start, gather all the essential materials. Having everything ready will make the process smoother and more enjoyable. Here’s what you’ll need:
- Glow-in-the-Dark Acrylic Powder: This is the star of the show. Choose your favorite glow colors.
- Acrylic Liquid Monomer: To mix with the acrylic powder.
- Nail Primer and Dehydrator: These help the acrylic adhere better to your nails.
- Base and Top Coat: For long-lasting wear and extra shine.
- Nail Brushes: Use a good quality brush for a smooth application.
- Nail File and Buffer: To shape and smooth your nails.
- UV or LED Lamp: Necessary for curing the acrylic.
- Lint-Free Wipes and Alcohol: To clean your nails and remove any dust or residue.
Application Process
Once you have all your materials ready, it’s time to start the application process. Follow these steps for the perfect glow-in-the-dark Halloween nails:
- Prep Your Nails: Begin by cleaning your nails thoroughly. Apply the nail primer and dehydrator to prepare your nails for the acrylic.
- Mix Acrylic Powder and Liquid: Dip your brush into the acrylic liquid monomer, then into the glow-in-the-dark acrylic powder. Mix until you have a small bead of product on your brush.
- Apply to Nails: Carefully apply the acrylic mixture to your nails, shaping it as you go. Work quickly but precisely, as the mixture will start to harden.
- Cure Under Lamp: Place your nails under the UV or LED lamp to cure the acrylic. This step is crucial for setting the product.
- Shape and Buff: Once cured, use your nail file and buffer to shape your nails and smooth out any rough edges.
- Apply Base and Top Coat: Finish by applying a base coat and a top coat. Cure under the lamp again for a long-lasting finish.
- Clean Up: Use lint-free wipes and alcohol to clean any dust or residue from your nails.
And there you have it! Your glow-in-the-dark Halloween nails are ready to impress. Will you go for a spooky green glow or a mysterious purple? The choice is yours!
Have you ever tried glow-in-the-dark nails before? What was your experience like? Share in the comments below!
Frequently Asked Questions
What Color Nails Should I Get For Halloween?
Opt for classic Halloween colors like black, orange, purple, or green. Consider spooky designs like spiders, pumpkins, or ghosts.
Do Acrylic Nails Need Uv Light?
No, acrylic nails do not need UV light. They cure through air drying or with a catalyst liquid. UV light is used for gel nails.
How To Do Easy Halloween Nails?
Paint your nails with Halloween-themed colors like orange, black, and purple. Add simple designs like spiders, webs, or ghosts using nail art tools or stickers. Finish with a clear topcoat for a polished look.
Which Is Better, Gel Nails Or Acrylic?
Gel nails provide a natural look and flexibility, while acrylic nails offer strength and durability. Choose based on your preference.
What Are Halloween Acrylic Nails?
Halloween acrylic nails are themed nail designs. They feature spooky, festive patterns perfect for Halloween.
Conclusion
Creating Halloween acrylic nails is fun and creative. With spooky designs, you can impress everyone. Choose colors that match your costume. Experiment with different shapes and patterns. Don’t be afraid to try new ideas. Your nails will surely stand out.
Remember to take care of your nails. Use quality products for lasting designs. Enjoy the process and let your imagination run wild. This Halloween, let your nails be your best accessory. Happy Halloween and happy nail designing!