
If you’ve just got your Brother Label Maker or have been using it but feel stuck, this guide is made for you. Understanding how to get the most out of your device can save you time and frustration.
You’ll find clear, step-by-step instructions for the Brother Label Maker, especially focusing on the features and tips in Part 70. By the end, you’ll feel confident creating perfect labels for your home, office, or projects. Keep reading—you’re about to unlock the full potential of your Brother Label Maker.
Getting Started With Brother Label Maker Pt 70
Starting with the Brother Label Maker Pt 70 is simple and quick. This device helps you create clear, professional labels. Follow these steps to set it up and begin labeling right away.
Unboxing And Components
Open the box carefully. Inside, you will find the label maker, a power adapter, and a user manual. Check for label tapes and batteries if included. Make sure all parts are undamaged and complete before use.
Charging And Powering On
Connect the power adapter to the label maker. Plug it into a power outlet to charge. Press the power button to turn the device on. Wait a few seconds for the screen to light up and the device to be ready.
Initial Setup Steps
Choose your language from the menu. Set the date and time for accurate label printing. Load the label tape into the slot, following the arrows inside the tape compartment. Close the cover securely before printing labels.
Navigating The Interface
Navigating the interface of the Brother Label Maker PT 70 is simple. The device has a clear screen and easy buttons. This section explains how to use these features. Understanding the screen, keyboard, and menu helps you create labels faster. Follow the steps below to get comfortable with the device.
Understanding The Display Screen
The display screen shows all your label text and options. It is a small, clear LCD that uses black and white colors. The screen displays letters, numbers, and symbols as you type. It also shows the current settings like font size and style. Watch the screen closely to avoid mistakes before printing.
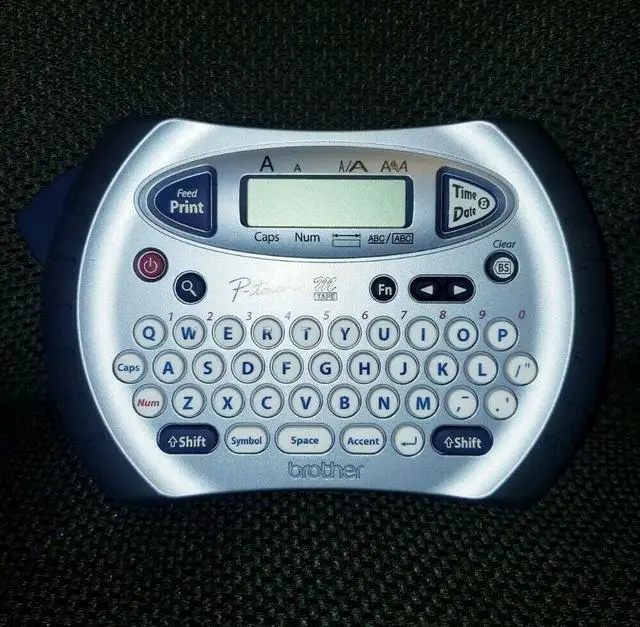
Using The Keyboard And Buttons
The keyboard has all letters, numbers, and symbols needed. It works like a computer keyboard but smaller. Use the space bar to add spaces between words. Special buttons help you delete mistakes or move the cursor. Press the “Print” button to start printing your label. Practice typing to get faster and more accurate.
Accessing Menu Options
The menu button opens a list of label settings. You can change font style, size, and print layout here. Use arrow buttons to scroll through options. Press “OK” to select the setting you want. This menu lets you customize labels to fit your needs. Spend some time exploring the menu for best results.
Creating Your First Label
Creating your first label with the Brother Label Maker is simple and fun. This device helps you organize your space quickly. Follow the steps below to make your first label with ease.
Selecting Label Size And Style
Start by choosing the size of your label. The Brother Label Maker offers various widths. Pick one that fits your project needs. Next, select the style. You can choose from different border designs and layouts. These options make your label look neat and clear.
Entering Text And Symbols
Type the words you want on your label. The keyboard is easy to use and responsive. Add symbols or special characters to make your label unique. The label maker has many symbols to choose from. This step lets you personalize your label.
Adjusting Font And Alignment
Change the font style to match your taste. The Brother Label Maker has several fonts available. Adjust the size to make the text easy to read. Align the text to the left, center, or right. Proper alignment gives your label a clean look.
Credit: www.newegg.com
Advanced Label Customization
Advanced label customization lets you create labels that stand out. It offers tools to add style and function to your labels. These features help make your labels clear and attractive.
With Brother Label Maker Pt 70, you can add frames, barcodes, and graphics. You can also save your designs for future use. These options make labeling easier and more creative.
Using Frames And Borders
Frames and borders highlight your label text. Choose from different styles and thicknesses. You can select a frame that matches your label purpose. Frames help separate information and make labels neat.
Adjust the size of the border to fit your label size. Experiment with colors to create contrast. Frames can guide the reader’s eye to important details. Simple frames improve the overall look without clutter.
Adding Barcodes And Graphics
Barcodes add a professional touch and improve scanning. Use the label maker to generate barcodes easily. Select the barcode type that fits your needs. Barcodes help with inventory and tracking.
Graphics like icons or small images add meaning. Insert symbols for caution, direction, or information. Use simple images to keep the label clear. Graphics help users understand the label quickly.
Saving And Reusing Designs
Saving designs saves time for future projects. Store your favorite label layouts in the device. Reuse saved designs to keep consistency across labels. This feature is useful for repetitive tasks.
Modify saved labels easily without starting from scratch. Keep your brand style uniform with saved templates. Saving designs reduces errors and speeds up labeling. It helps maintain a professional look every time.
Printing Labels
Printing labels with the Brother Label Maker Pt 70 is simple. The device offers clear, sharp prints for various labeling needs. Understanding the correct steps ensures smooth operation and quality output.
Follow these guidelines to load tape, set print options, and fix common problems. This helps keep your label maker working well and produces professional labels every time.
Loading Label Tape
Open the tape compartment by pressing the release button. Insert the tape cartridge with the tape end facing out. Close the compartment gently until it clicks. Check that the tape feeds smoothly without jams. Proper loading prevents printing errors and wasted tape.
Print Settings And Quality
Choose the right label size in the settings menu. Adjust print density for clearer or lighter text. Select font style and size to fit your label needs. Use the preview option to check before printing. Clear settings improve label appearance and readability.
Troubleshooting Common Issues
If labels print faint or incomplete, clean the print head carefully. Check tape installation for proper alignment. Replace low or empty tape cartridges promptly. Reset the device if it freezes or malfunctions. Regular maintenance avoids common printing problems.
Maintenance And Care
Proper maintenance keeps your Brother Label Maker working well. Caring for the device helps avoid common problems. Simple steps improve performance and extend its life.
Cleaning The Printer Head
Clean the printer head regularly. Use a soft cloth or cotton swab. Lightly moisten it with rubbing alcohol. Gently wipe the printer head to remove dust and dirt. Avoid using sharp objects that can damage the printer head.
Replacing Batteries And Tape
Open the battery compartment carefully. Remove old batteries and replace them with fresh ones. Check the battery type before buying new ones. For tape replacement, open the tape cover and take out the used tape cartridge. Insert a new tape cartridge firmly until it clicks. Close the cover securely to avoid tape jamming.
Software Updates And Support
Keep your label maker’s software up to date. Visit the Brother official website to download updates. Updated software improves functionality and fixes bugs. Contact Brother support for any technical help. They provide guidance for troubleshooting and repairs.
Tips For Efficient Label Making
Making labels with the Brother Label Maker can be quick and simple. Using the right tips helps save time and reduce errors. Organizing your work and caring for your machine keeps everything running smoothly. Here are key ways to make your label making more efficient.
Keyboard Shortcuts
Keyboard shortcuts speed up the label creation process. Use shortcuts for copy, paste, and undo to work faster. For example, pressing “Ctrl + C” copies text, and “Ctrl + V” pastes it. Shortcuts reduce the need to navigate menus. Learning a few important keys cuts down on delays.
Organizing Label Projects
Keep label projects in folders on your device. Name files clearly to find them easily later. Group similar labels by category or purpose. This method saves time when editing or reprinting labels. A tidy project system helps avoid confusion and mistakes.
Maximizing Label Maker Lifespan
Clean the label maker regularly to avoid jams and errors. Use only compatible tapes and cartridges to protect the machine. Turn off the device when not in use to save power. Store the label maker in a dry, safe place. Proper care extends its life and keeps performance steady.

Credit: www.amazon.se

Credit: manuals.plus
Frequently Asked Questions
How Do I Set Up My Brother Label Maker?
Turn on the device, insert the label tape, and follow the on-screen instructions to start.
How Can I Change The Font Style On The Brother Label Maker?
Press the font button, choose your desired style from the menu, then press OK.
What Type Of Batteries Does Brother Label Maker Use?
Most Brother label makers use AA batteries, but check your model’s manual to be sure.
How Do I Print A Label With A Brother Label Maker?
Type your text, press the print button, and wait for the label to come out.
How To Clean The Brother Label Maker For Better Printing?
Use a soft, dry cloth to clean the outside and tape path regularly for smooth printing.
Conclusion
Following these Brother Label Maker instructions makes labeling easy. You can create clear, neat labels quickly. The device works well for home or office use. Practice a little, and you will improve fast. Keep the manual handy for reference anytime.
Labeling helps keep things organized and tidy. Try different fonts and sizes for better results. Enjoy your new skill and save time daily. Simple steps lead to great labels every time.